Before you start
This post is intended to be a straightforward, beginner-friendly guide to getting spritesheet-based art in engine to use with Unity’s native tilemaps. It assumes you have comfort with the basics of working in Unity (add files to project, working in Hierarchy and Inspector).
Note that the Unity project in this post is using version 2023.1.18f1 (because I want to fiddle with newer 2D light and shadows features) but if you are using an older or LTS version of Unity, setting up tilemaps works the same way.
If you spun up your project using the default 2D project, it should have the right Packages to use Tilemaps. If not, you may need to grab a few of these from the Unity Registry to use in your project.

Step 1: Import your spritesheet into Unity
Simply drag your spritesheets into a folder for art in your Unity project.
Since I will be working with a lot of tiles, I have created multiple folders (under Assets, I added Art/World/Spritesheets/Exteriors) to help better structure my assets.

Step 2: Configure the spritesheet textures
Click on your spritesheet. In the Inspector, you should see a number of settings you can configure.
Since I am using pixel art, there are a few important settings I should set to ensure the art is crisp and consistent with other spritesheets I might use for tilemaps.
First up, set the Sprite Mode to multiple since we’ll want to break down that sheet into multiple modular pieces.
For Pixels Per Unit, set to your preferred style. Many tilesets are optimized for either 8, 16, 32 or 64 bit. I am going to use 16 since they is what this one has been designed for.
I pulled extrude edges to 0 and unticked generate physics shape as I don’t require that.
Lastly, make sure for pixel art you are setting Wrap Mode to Clamp and Filter Mode to Point (no filter). Setting Compression to None will also ensure your pixel art looks very crispy. 🍟
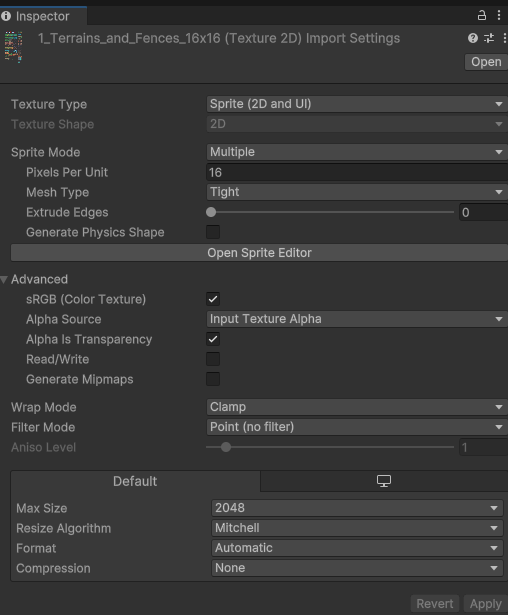
Click Apply.
Step 3: Open the Sprite Editor to slice things up
Now, in the same Inspector menu, click the Open Sprite Editor button. A window should open.
Here, we can split up our sheet into the desired tile sizes. Click Slice in the top left, then from the dropdown select Grid by Cell Size.
Since I am going for 16px for my art, I will set both X and Y to 16. Pick the size you need. You will see a preview in red lines (as below) with the cell size you have selected. This is a good opportunity to make sure it looks right e.g. the tiles will have a modular use if prepared this way.
Keep all other settings the same and click Slice. (Note, you can always re-slice if you mess up – it’s not a big deal).
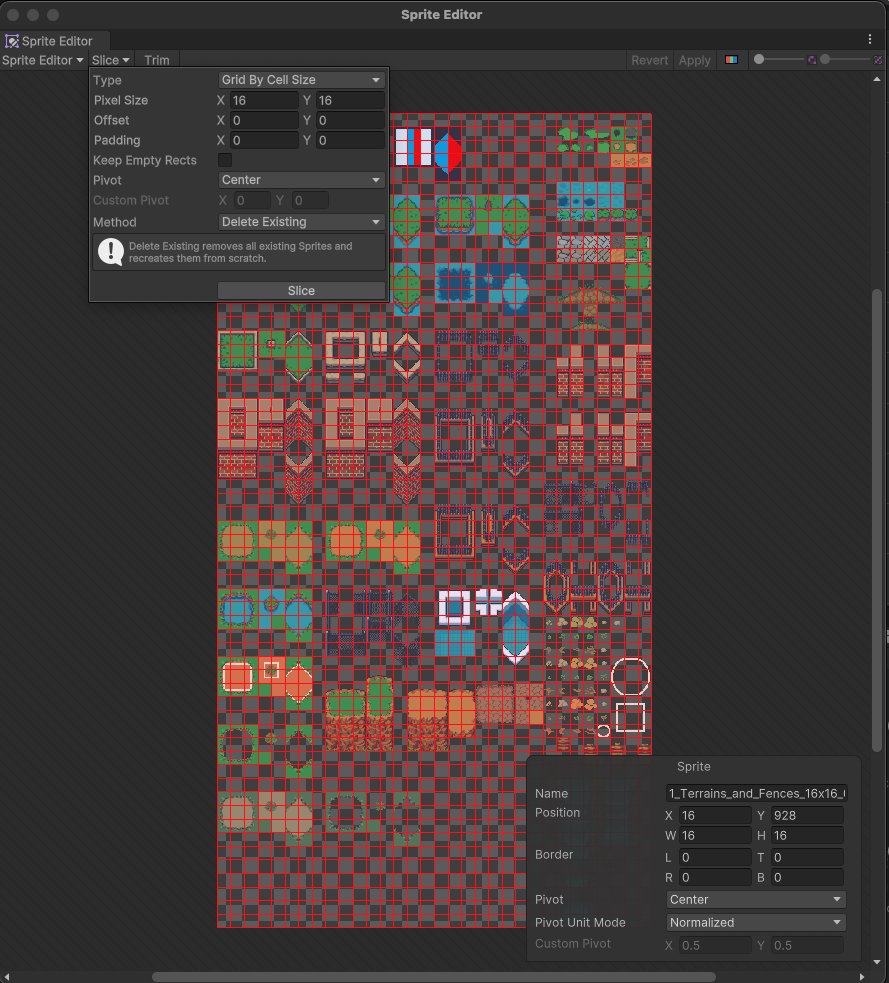
Click Apply. Once it is done, you can close this window.
Step 4: Create a Tile Palette
First, I recommend setting up a Tile Palettes folder in your Unity project to keep things under control.
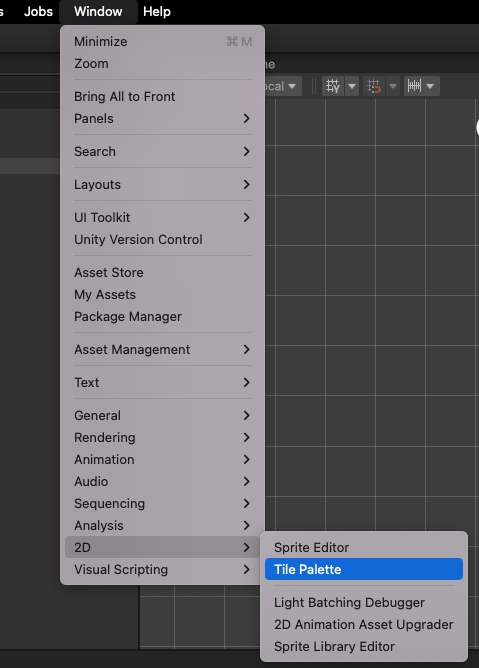
Next, if you haven’t used the Tile Palette window before, you can open it by going to Window, then 2D, then Tile Palette. I like to keep it docked under my inspector but dock it anywhere you like.
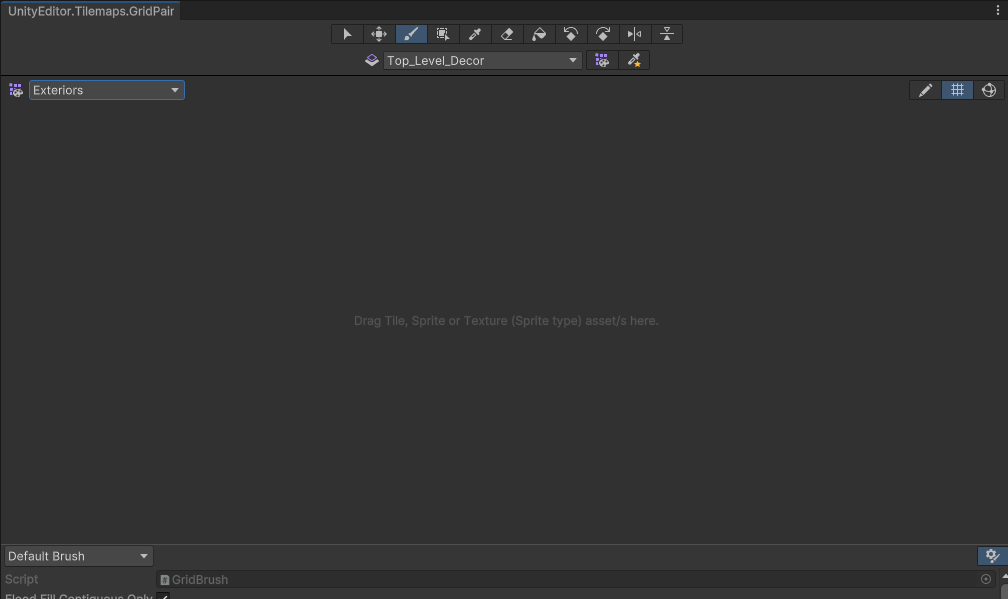
Finally, we’ll make a tile palette where we can add our new tiles! 🎨
Ok, make sure you have your Tile Palette window open:
- Click on the dropdown in the top-left corner
- Then click Create New Tile Palette
- Give it a descriptive name that will help you understand the intended contents of that palette (e.g. Furniture, Terrain, etc). I’ll call ours “Exteriors”. Click Create.
- When it asks where to save it, pick your Tile Palettes folder to keep things tidy.
You should see an empty palette like so.
Step 5: Add your tiles to your palette
Ok, now simply drag your chopped up spritesheet into the blank area of your palette.
When it asks where to generate your tiles, I recommend to make another new folder inside of your Tile Palettes one to hold those hundreds of files, or just be bad like me and stick them all in the Tile Palettes folder. 🤭
Give it a few seconds to finish adding them, and it should look something like this. ✨
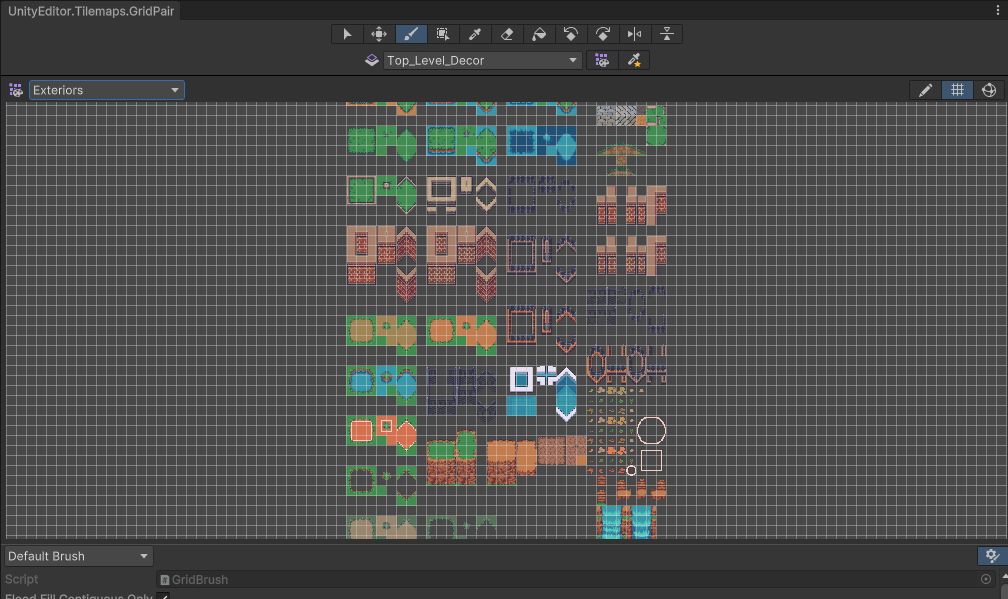
Nice, they are now ready to paint onto a tilemap!
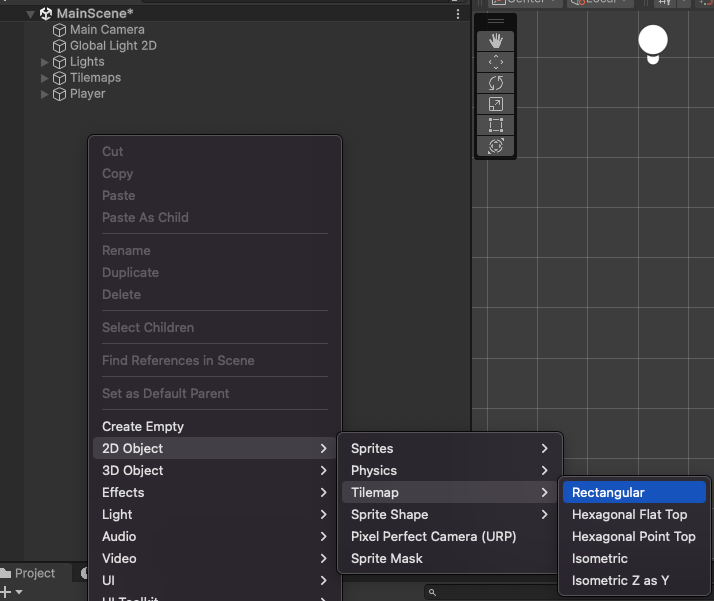
Step 6: Add a tilemap in your hierarchy
Right-click in the hierarchy and add a tilemap. Obviously, there are other forms of tilemaps like isometric and hex styles, but we are going for a simple rectangular style. ⬛️
Step 7: Make two tilemaps (for now)
Click on the Tilemap in your hierarchy to see its settings in the Inspector. I will be leaving everything default for now, but there is much you can do.

Let’s duplicate the Tilemap (child of Grid) object.
I am going to name one of them Ground and other one Decor. This will mean we can paint onto those layers for organization and to control layering between our tiles.
Click on the Ground one, and make sure Additional Settings is expanded.
For Order in Layer, leave it on 0.
Now, click on Decor and set the Order in Layer value to 1. This means that Decor will appear on top of Ground. 🎩
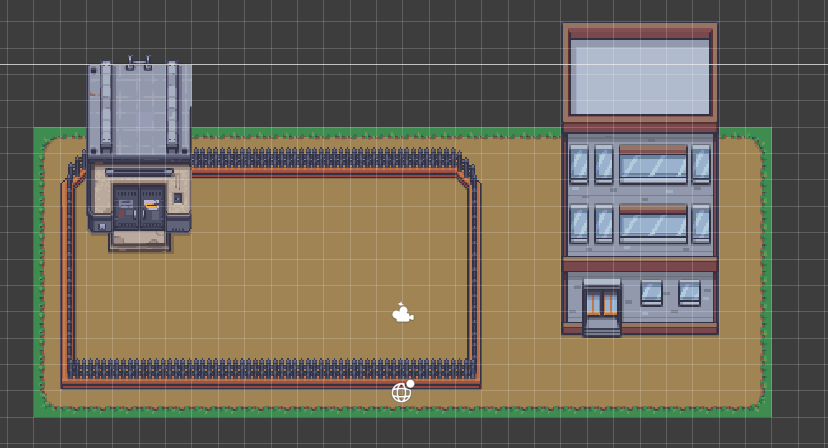
Step 8: Populate your tilemap with tiles!
Make sure you have Tile Palette open, as well as your Scene window.
In your Tile Palette window, pick the layer you want to paint on, then with the Brush icon selected, pick a tile from the palette and paint it around in your scene. In my case, I painted some dirt and grass-looking tiles on the Ground tilemap.

You can use other brushes and functionality in the tile palette window such as erasing, flood fill, etc but we won’t go through all of them here.
Now, select your other tilemap in the palette window and try to add some decorations that you think should layer on top of the other tilemap.
Ta-da! This is only using two layers of tilemaps, but I could easily create more to add more tilemaps to layer (e.g. graffiti).
Wrap-up
That’s really all there is to it. Here are some hot tips you might find helpful when getting up and running with tilemaps.
- This is more of a nag than a tip, but always make sure you are on the right tilemap layer before painting tiles. You can use ctrl+I to select and copy tiles from one tilemap to another tilemap if you mess up, but it is a pain so I want to save you a headache.
- Toggle on or off your Tilemaps objects in the hierarchy to easily see what exists on each, or to hide ones you might not want to see at the moment.
- You can add multiple spritesheets to a single tile palette. For example, maybe you have multiple sheets of buildings but you want to consolidate them all on a tile palette called “Buildings” for easy access.
- It’s a personal preference whether you like to have huge tile palettes or a larger number with fewer tile assets. Do whatever works for your brain!
- It will take trial and error (or perfect planning lol) to determine the number of tilemaps and ordering layers you will need to support your game. You may want a tilemap specifically for collisions (e.g. it might have all furniture within it and a composite collider on the tilemap), and you will more than likely end up with more than you planned at the start. For example, one of my released games using pixel art spritesheets has 7 tilemaps, most with different sorting orders and some of the tilemaps are reserved for collidable items. Until you figure out the right system, it will mean you sometimes have to shift tiles between tilemaps or strategize on the optimal way to organize.
- Sometimes, it’s important for objects to layer in front of other objects when they are in front of them and behind them when they are behind them. The best solution is to go to your renderer’s settings, set the sort mode from default to by axis and set the Y value to 1. This will save you a lot of hassle in the long run with sorting objects as even if they are on the same sorting layer, the ones closer to the bottom of the screen will layer on top.
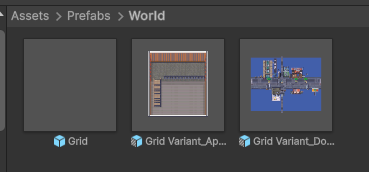
- 🧊 Once you find the ideal way to organize your tilemaps for a zone, you could prefab the object with the Grid component and manage your areas as prefab variants based off the parent grid.
- There are handy shortcuts you can learn to speed up the process of using different brushes or performing different actions with tiles.
- Using Tilemap extras, you can also add animated tiles to give more life to your maps. They are a bit of a pain to set up, but can be super handy for water environments or fountains.